How to choose and install a free Shopify theme?
The theme decides how your store looks. Shopify offers free themes, designed and maintained by Shopify: they are the best place to start.
The essentials in 30 seconds
- Open the Theme Store
- Filter by your business
- Add the theme to your store
- Preview and customize
- Publish it
Avoid: Buying a paid theme right away: free themes are enough for a first store.
See the details with screenshots ↓Step by step
Screenshots show the interface used in the original guide (Shopify in French, Leadpages in English). In your account, buttons appear in your language.
- 1
Open the Theme Store
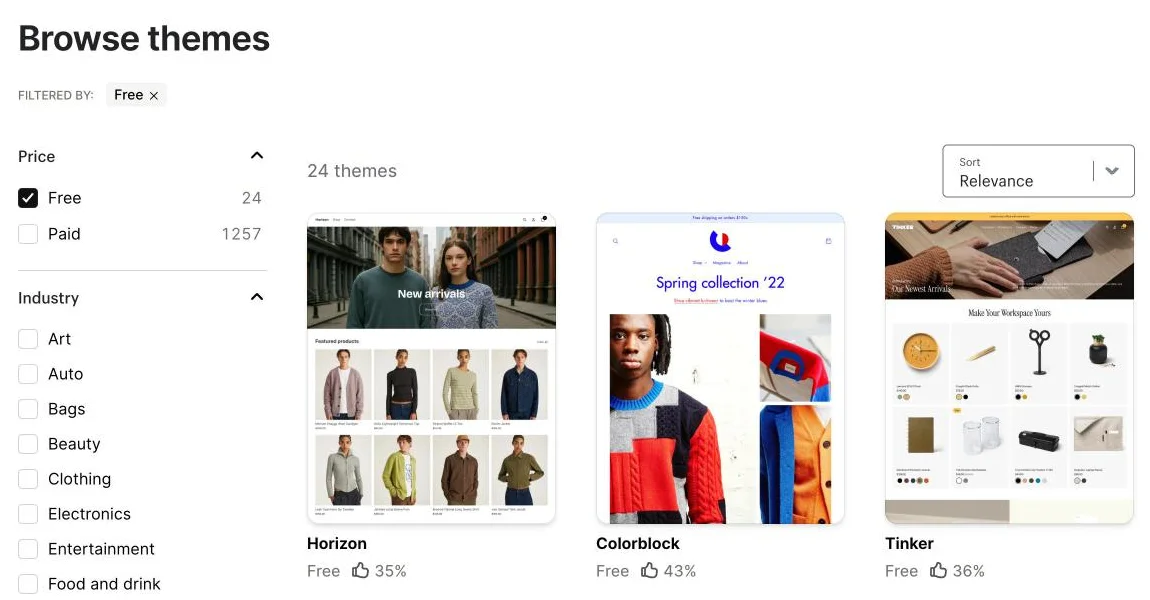
Go to themes.shopify.com or, in the admin, to « Online Store » then « Themes ». In the « Price » filter, check « Free » to see only free themes.
- 2
Filter by your business
Use the « Industry » filter (clothing, beauty, home, food…) and look mostly at how the theme shows products, not at the demo photos.
- 3
Add the theme to your store
Open the theme page and click « Add ». It goes into your theme library without replacing the one that is live.
- 4
Preview and customize
Click « Customize »: add your logo, colors, fonts and the home page sections. Also check the mobile preview.
- 5
Publish it
When everything looks right, click « Publish ». Only one theme is live at a time; the old one stays in the library and you can switch back.
Try it yourself
Shopify starts free, then has a discounted launch offer. You can set everything up before paying.
Try Shopify ↗Affiliate link: it does not change the price for you.
Common mistakes
- Buying a paid theme right away: free themes are enough for a first store.
- Publishing without checking the phone view, when most visits come from mobile.
Official sources
Get the next guides
New Leadpages, HTML Pub and Shopify guides by email, every two weeks. No spam, unsubscribe in one click.