How do you build a sales funnel with Leadpages and Shopify from start to finish?
A sales funnel is the path a visitor takes from discovering your offer to buying. Instead of sending everyone straight to your Shopify store, you first capture their email with a Leadpages landing page, win them over by email, then send them to Shopify to buy. This guide builds the whole funnel, from the first page to the first payment.
The essentials in 30 seconds
- Understand how a sales funnel is built
- Get your offer ready in Shopify
- Create an irresistible lead magnet
- Build the opt-in landing page
- Connect your email service
- Write the email sequence
- Create a discount code in Shopify
- Build the sales page
- Set up the thank-you page
- Test the whole funnel
- Send traffic to the opt-in page
- Track results at each stage
- Optimize with A/B tests
Avoid: Sending traffic straight to Shopify without capturing the email first: visitors who leave are lost for good.
See the details with screenshots ↓Step by step
Screenshots show the interface used in the original guide (Shopify in French, Leadpages in English). In your account, buttons appear in your language.
- 1
Understand how a sales funnel is built
A sales funnel has four stages: grab attention, capture the lead, nurture the relationship by email, then offer the purchase. Each stage has the right tool.
Leadpages handles the first two: the landing page that attracts and the form that captures the email. Your email marketing service handles the third. Shopify handles the last: payment and delivery. Together they form an automated system that sells while you sleep.
- 2
Get your offer ready in Shopify
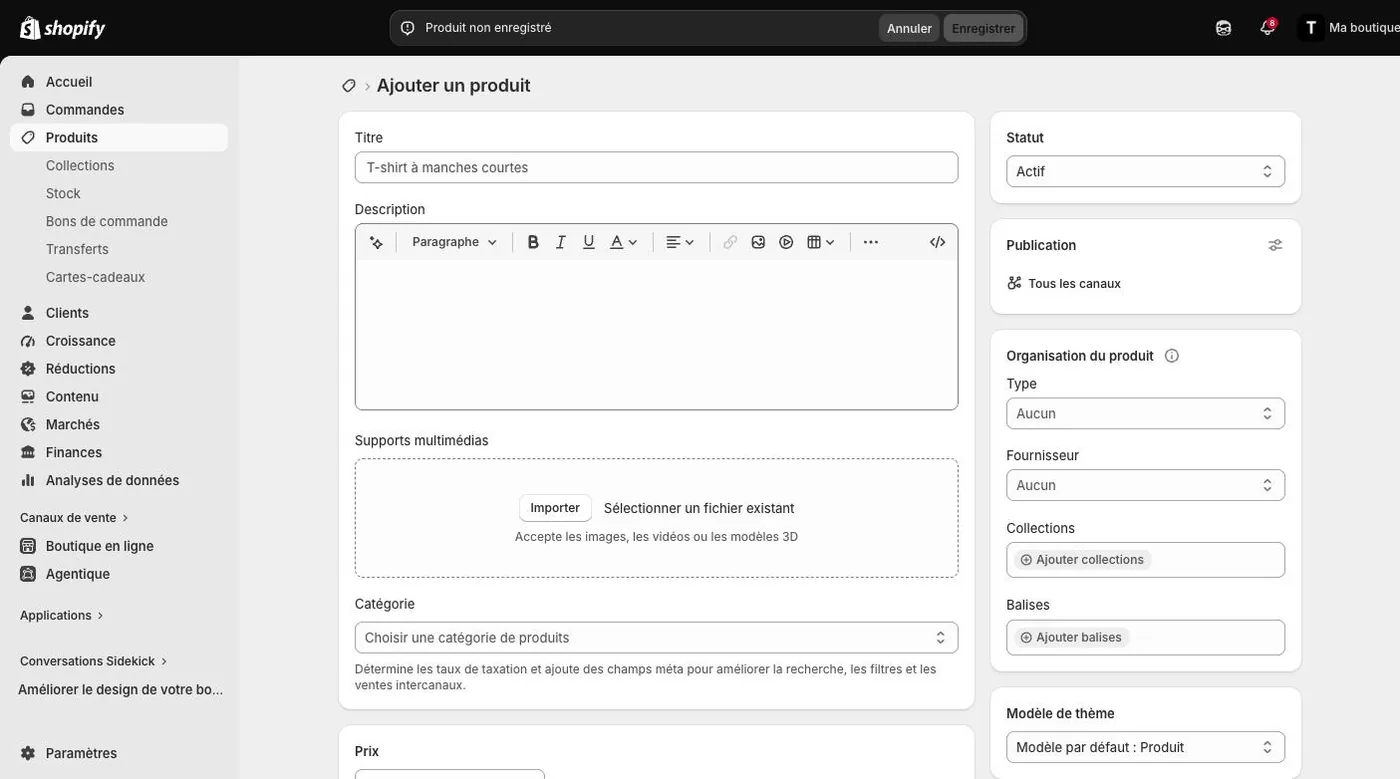
Before building the funnel, your product must be ready in Shopify. Create it with photos, price, description and variants. Check that payment works by placing a test order.
Copy the direct link to the product or collection: you'll need it for the buy button in your emails and on your sales page.
- 3
Create an irresistible lead magnet
The lead magnet is what you offer in exchange for the email. A PDF guide, a checklist, a discount code, early access. It must solve a concrete problem for your ideal customer and tie directly to your paid product.
Example: you sell kitchen accessories on Shopify. Your lead magnet could be « 10 quick weeknight recipes » as a PDF. The visitor gives their email, gets the recipes, then your emails introduce your accessories.
- 4
Build the opt-in landing page
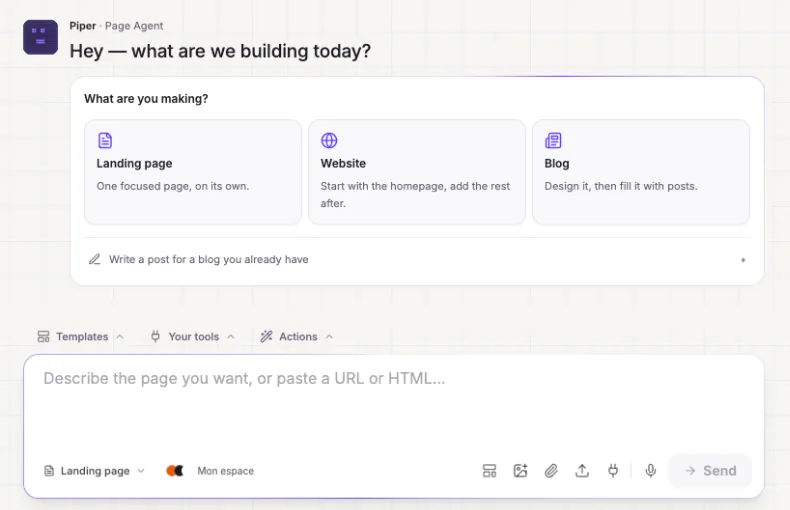
In Leadpages, create a new page from a template or with AI. The page has one goal: convince the visitor to leave their email in exchange for the lead magnet.
The headline announces the lead magnet's benefit. The form asks for email only. The button says exactly what the visitor gets: « Get the 10 recipes » rather than « Sign up ». Remove anything distracting: no menu, no links to other pages.
- 5
Connect your email service
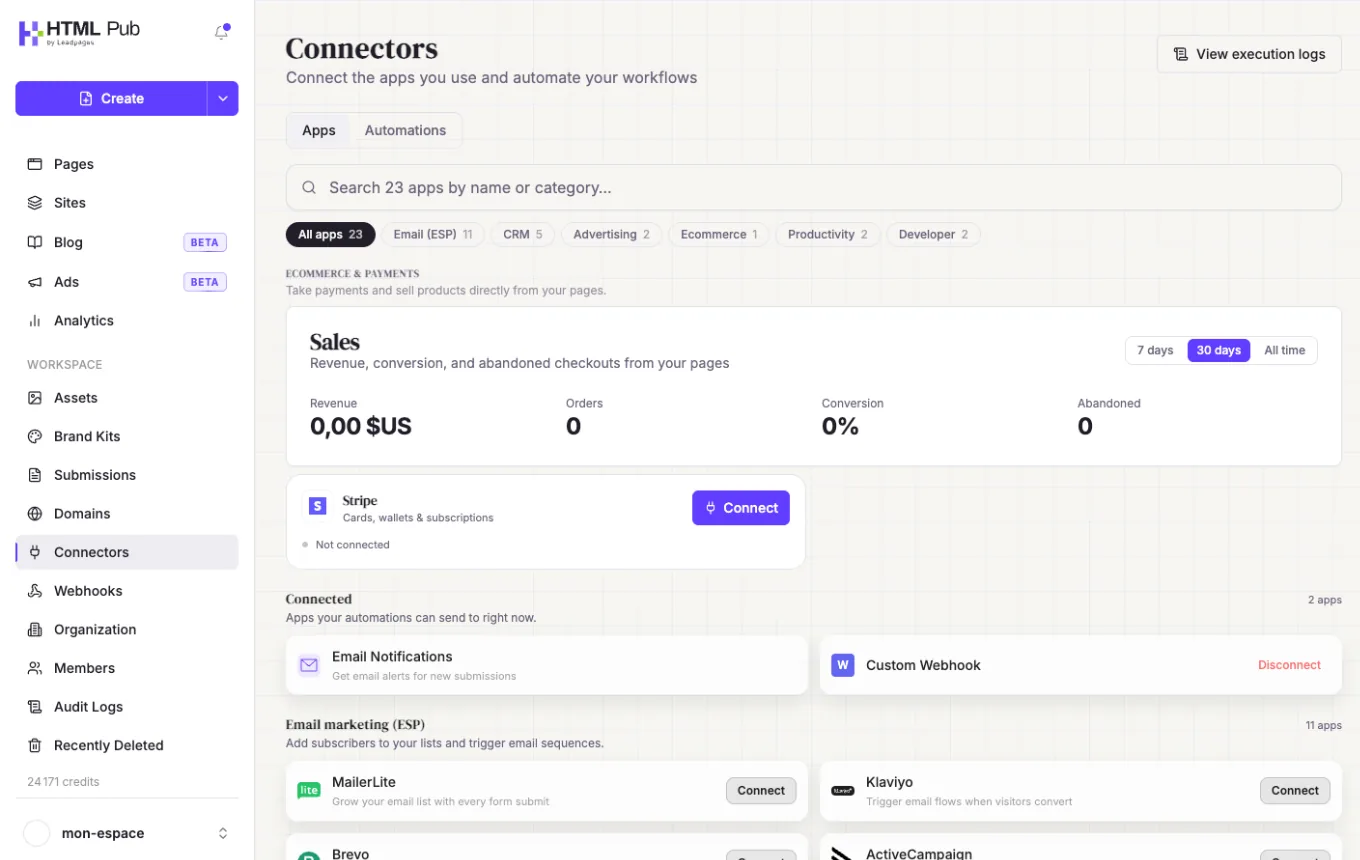
In Leadpages, open your page's integrations and connect your email marketing service: Mailchimp, Kit (formerly ConvertKit), ActiveCampaign or another. Every new subscriber is added automatically to a specific list or tag.
Create a list or tag just for this funnel so your sales emails only reach people who asked for this particular lead magnet.
- 6
Write the email sequence
Prepare 4 to 6 automated emails sent over 7 to 10 days. The first delivers the lead magnet. The next ones bring value and gradually introduce your Shopify product.
Email 1: lead magnet delivery + a quick intro to you. Email 2: a tip related to the lead magnet's topic. Email 3: the story of a customer who solved their problem with your product. Email 4: the product pitch with the link to Shopify. Email 5: a reminder with a time-limited discount code.
- 7
Create a discount code in Shopify
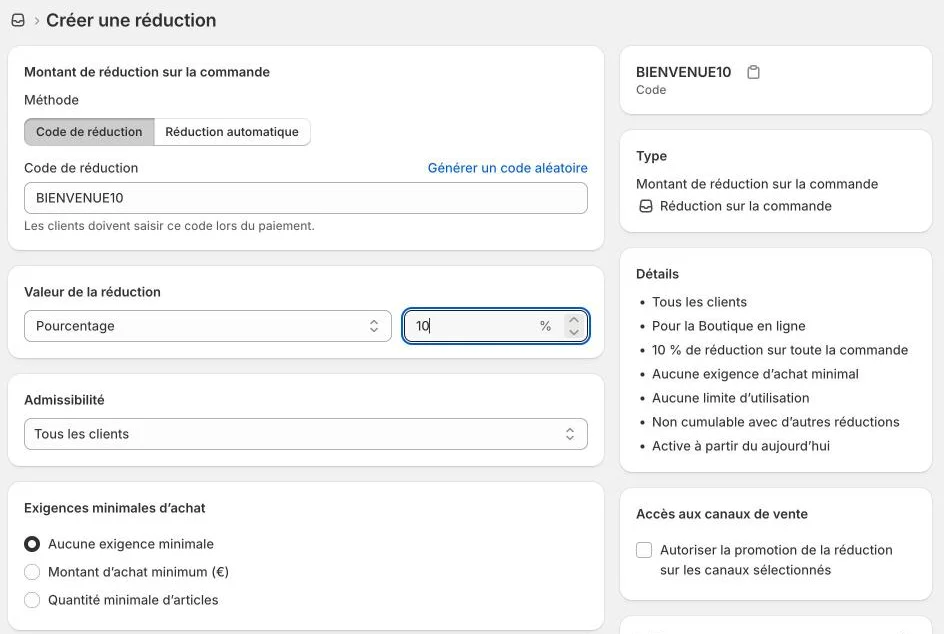
In Shopify, go to Discounts and create a promo code just for your funnel subscribers. A code like WELCOME15 for 15% off the first order gives people a reason to buy now rather than later.
Limit the code to one use per customer and set an end date to create real urgency.
- 8
Build the sales page
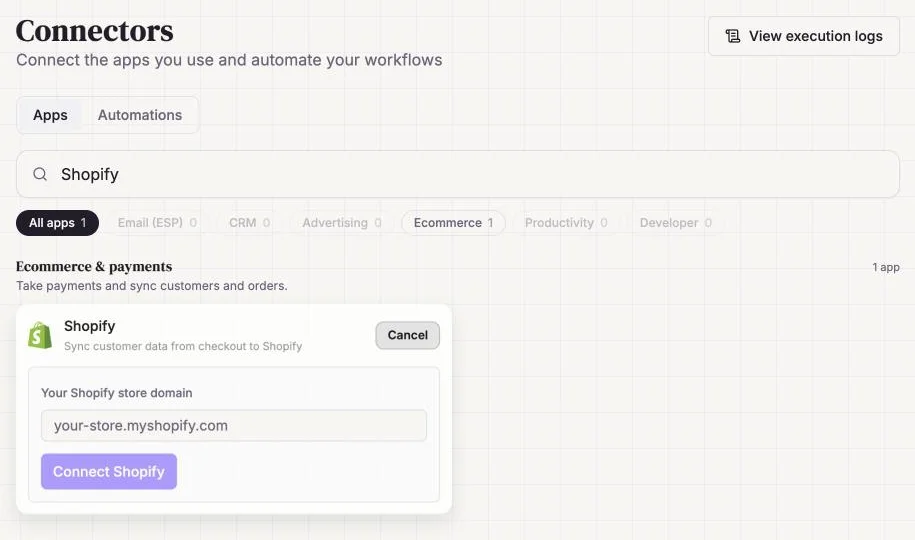
Create a second page in Leadpages: the sales page. It's where your emails send contacts who are ready to buy. It presents your product in detail with a button that leads to Shopify.
This page is longer than the opt-in page: testimonials, product details, guarantee, FAQ. The buy button uses the direct link to your Shopify product.
- 9
Set up the thank-you page
After signing up on the opt-in page, the visitor lands on a thank-you page. Use it to build engagement: remind them to check spam, invite them to follow you on social media, or give a preview of your Shopify product.
In Leadpages, set the post-form redirect to your thank-you page. You can also put your offer with the discount code right there for people in a hurry.
- 10
Test the whole funnel
Before sending traffic, go through every step yourself. Sign up with a test address, check that the welcome email arrives, click every link in the sequence, and place a test order on Shopify with the discount code.
Check on mobile too: most traffic will come from there. If an email doesn't display well or a button is too small, fix it before launching.
- 11
Send traffic to the opt-in page
The funnel is ready: now it needs visitors. The most common sources: a Facebook or Instagram ad targeting your audience, a social media post with the page link, a blog post that points to the lead magnet, or a partnership with a creator in your niche.
Start with a small ad budget to confirm the funnel converts before spending more.
- 12
Track results at each stage
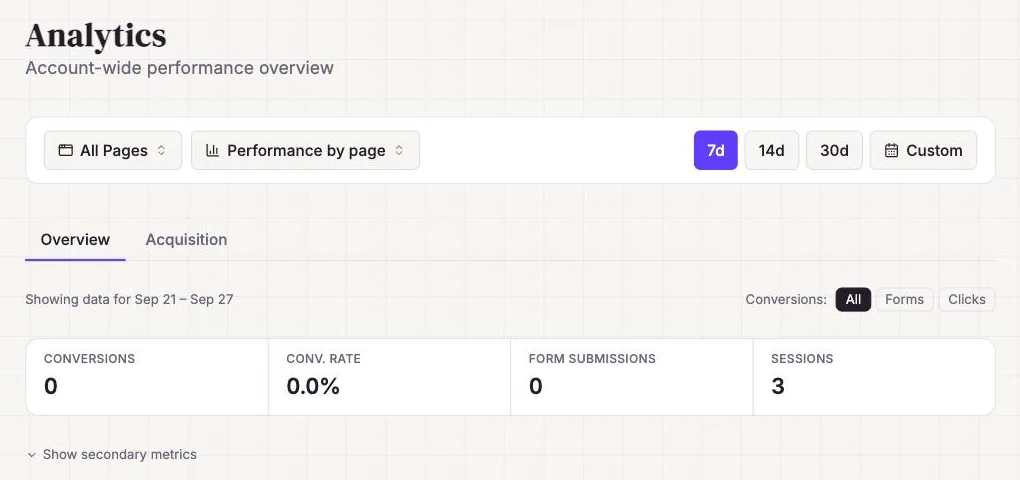
A sales funnel is measured stage by stage. Write down the landing page conversion rate, the email open rate, the click-through rate to Shopify and the final purchase rate.
In Leadpages, the dashboard gives the page's conversion rate. In your email service, you see opens and clicks. In Shopify, sales with the discount code show how many sales come from the funnel.
- 13
Optimize with A/B tests
Once the funnel is running and producing data, improve each stage. Test two headlines on the opt-in page. Test two email subject lines. Test two prices or two offers on the sales page.
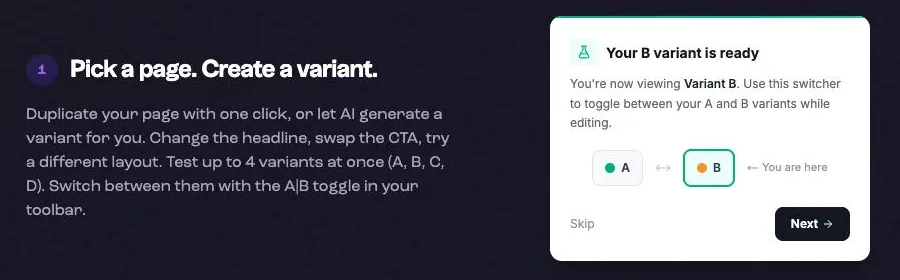
In Leadpages, use A/B tests for the opt-in page and the sales page. Change one element at a time and wait for at least 100 conversions per variant before picking a winner.
Try it yourself
Shopify starts free, then has a discounted launch offer. You can set everything up before paying.
Try Shopify ↗Affiliate link: it does not change the price for you.
Common mistakes
- Sending traffic straight to Shopify without capturing the email first: visitors who leave are lost for good.
- Writing a 100% promotional email sequence: contacts unsubscribe before they buy.
- Not testing the funnel on mobile before launching ads.
- Using a discount code with no end date: there's no reason to buy now.
- Launching paid ads before checking that every stage of the funnel works.
Official sources
Get the next guides
New Leadpages, HTML Pub and Shopify guides by email, every two weeks. No spam, unsubscribe in one click.