How do you accept payments on Shopify?
Shopify Payments lets you accept cards, Apple Pay, Google Pay and other payment methods without an outside provider. It's also what avoids extra transaction fees.
The essentials in 30 seconds
- Open « Payments »
- Turn on Shopify Payments
- Choose payment methods
- Add PayPal if needed
- Place a test order
Avoid: Using another provider instead of Shopify Payments without knowing that Shopify adds transaction fees (up to 2% on Basic).
See the details with screenshots ↓Step by step
Screenshots show the interface used in the original guide (Shopify in French, Leadpages in English). In your account, buttons appear in your language.
- 1
Open « Payments »
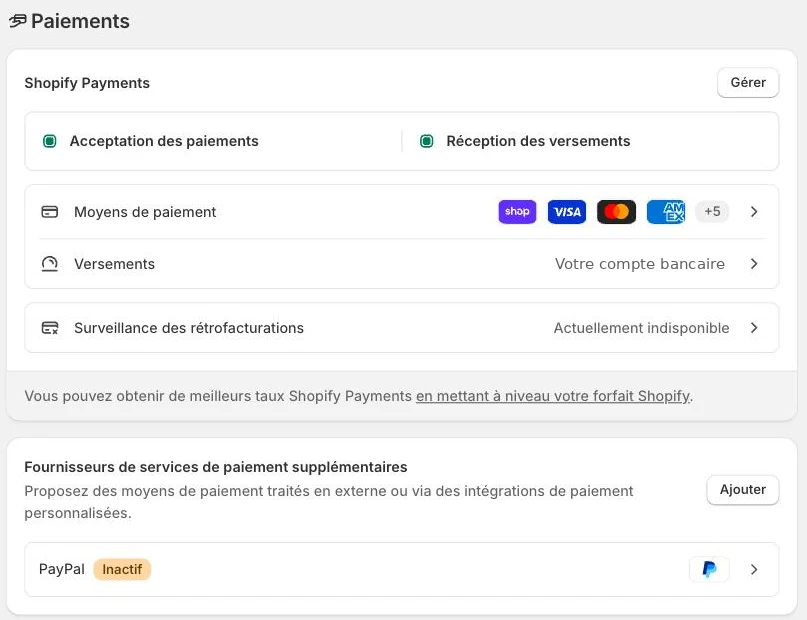
Click « Settings », then « Payments ». You'll see the status of Shopify Payments, your payment methods, your payouts and additional providers like PayPal.
- 2
Turn on Shopify Payments
Follow the setup: details about your business and the bank account for payouts. Two-step authentication is required.
- 3
Choose payment methods
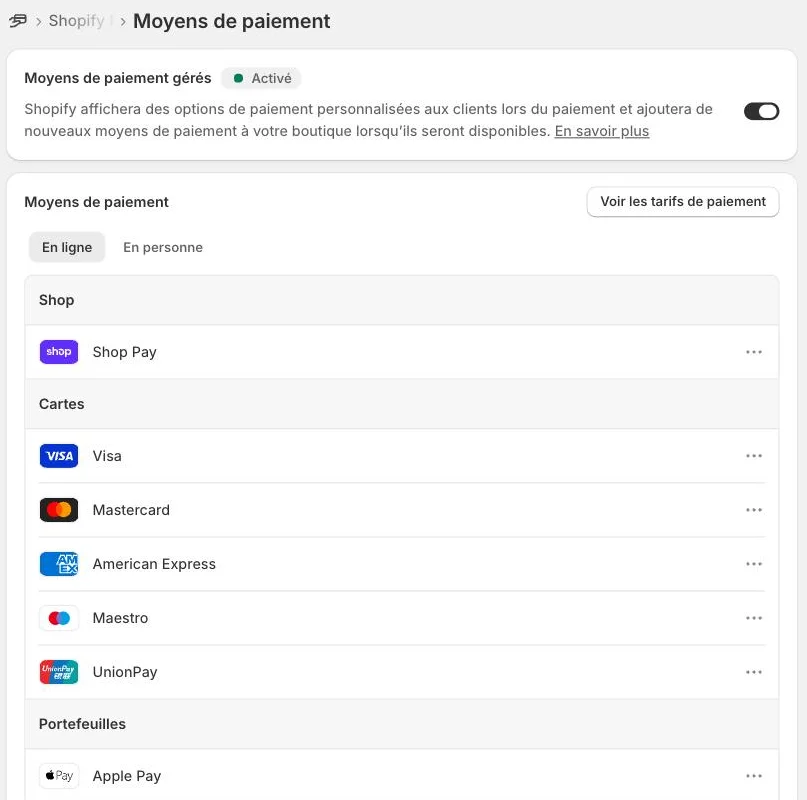
Open the payment methods and turn on the ones your customers use: cards, Shop Pay, Apple Pay, Google Pay, and buy now, pay later options if you want them. The button to view payment rates shows the fees for each method.
- 4
Add PayPal if needed
In the additional payment methods, you can add PayPal or other providers.
- 5
Place a test order
Before opening the store, place a test order to check that everything works.
Try it yourself
Shopify starts free, then has a discounted launch offer. You can set everything up before paying.
Try Shopify ↗Affiliate link: it does not change the price for you.
Common mistakes
- Using another provider instead of Shopify Payments without knowing that Shopify adds transaction fees (up to 2% on Basic).
- Skipping the payment methods your customers use most, like Apple Pay or Shop Pay.
Official sources
Get the next guides
New Leadpages, HTML Pub and Shopify guides by email, every two weeks. No spam, unsubscribe in one click.